
Nerd Rating:
Web Apps Using NextJS, AWS Amplify & Font Awesome - Part 1 of 4 - Application Basics

Part 1 - Application Basics - This post
Part 2 - Connecting Your Backend
Part 3 - Adding Icons
Part 4 - Using Font Awesome Pro with AWS Amplify
Part 1 of 4 - Application Basics
First in a four-part series where I show you how to set up a web application using Nextjs, AWS Amplify, Tailwind and Font Awesome. Note: this post series covers installation and setup of the various components, but does not go into detail on how to create your application once it's set up.
What we'll cover:
- Setting up your local development environment - VSCode and Hyper terminal
- Creating your frontend - Nextjs and Tailwind
- Hosting your frontend - AWS Amplify
- Resources
What you'll need:
- A development environment running Node.js
- A Github or other repository account
- An Amazon AWS account with admin privileges
- A sense of humor
Optional but nice to have:
- Gallons of coffee
- The ability to speak 'colorfully' in multiple languages
- A VERY understanding family
Set Up Your Local Development Environment
To get started, you'll need to be familiar with using a terminal program. I like Hyper Terminal. Mostly for the colors, not going to lie.

Additionally you'll need to set up the development environment of your choice. I use VS Code. It seems to integrate well with Amplify and is widely used, which makes the examples you will find when searching for information much easier to follow. Regardless, Amplify works with multiple IDEs so use the one you like best.
Create Your Front End
Now that you have your environment set up, it's time to create your front end. First, create a new Nextjs app using create-next:
npx create-next-app@latest
It will prompt you for the name of your project and will create the project directory for you. Now, navigate to the project directory you just created and we'll continue with our setup.
cd your-project
Optional: To disable sending anonymous stats to Nextjs:
npx next telemetry disable
If you like, you can start the development server now and make sure you have everything installed correctly. (Me, I like to live dangerously).
npm run dev
Open up your browser and navigate to localhost:3000 to see your results. To stop project, type control-c
Finally, we'll install Tailwind CSS for easy styling right in our components. If you're on Next.js v10 or newer:
npm install -D tailwindcss@latest postcss@latest autoprefixer@latest
If you're on Next.js v9 or older:
npm install -D tailwindcss@npm:@tailwindcss/postcss7-compat postcss@^7 autoprefixer@^9
Next, run tailwind init which will create an initial configuration file in your project:
npx tailwindcss init
Once that is complete, open your project in your chosen development environment and let's complete our setup. Replace the contents of your globals.css with the tailwind base layers. Note, the font stack is optional but is a good starting point.
globals.css
/* Add tailwind base layers */
@tailwind base;
@tailwind components;
@tailwind utilities;

@layer base {
     html {
       font-family: system-ui, -apple-system, "Segoe UI", Roboto, "Helvetica Neue", Arial, "Noto Sans", "Liberation Sans",
       sans-serif, "Apple Color Emoji", "Segoe UI Emoji", "Segoe UI Symbol", "Noto Color Emoji";
       font-weight: 300;
       line-height: 1.5rem;
    }
}
Then create postcss.config.js and add:
module.exports = {
  plugins: {
    tailwindcss: {},
    autoprefixer: {},
  },
}
Next, set up your git repository, if you haven't already done so and commit your initial changes as directed by your development environment. VSCode should set this all up for you, you should just have to go to the Source Control Tab and commit per the prompts.
To make connecting the back-end easier, you will also want to publish to a remote repository and sync your changes. If you are using VSCode you should also be able to do this right from the source control tab. If you are using GitHub you will be prompted for password, which will require you to create and enter a personal access token specific (PAT) to VSCode to allow access. More on how to do that here. Once you have everything syncing, you should be ready to add and style your components, which we won't cover here. For more information on how to do this, you can see the resources below and come back when you are ready.
Host Your Frontend
Now that you have everything under Source Control and syncing, it's time to create your backend. First, we'll have to disable SWC minify as it is not supported in Amplify as of this writing. Don't worry, we can just set the minify flag to false and everything will compile just fine.
next.config.js
/** @type {import('next').NextConfig} */
const nextConfig = {
   reactStrictMode: true,
   swcMinify: false,
}

module.exports = nextConfig
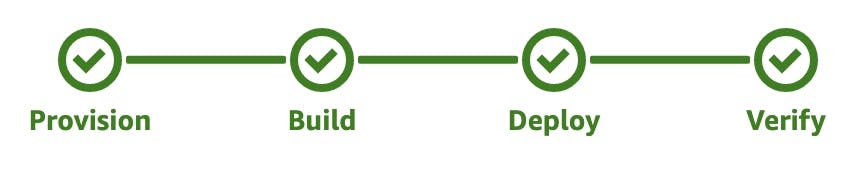
Next, open your browser and go to the AWS console and select the Amplify service. From the New App dropdown, select 'Host Web App'. You will then be prompted to select and connect with your Git provider (again GitHub will require you to create and enter a PAT). Once you've authenticated with your Git provider, you will be prompted to select a repository. Select the repository you just created, accept the default for the branch (it should be main) and select 'Continue'. Accept the default build settings on the 'Configure build settings' page and hit 'Next'. Review your details and then hit 'Save and deploy'.
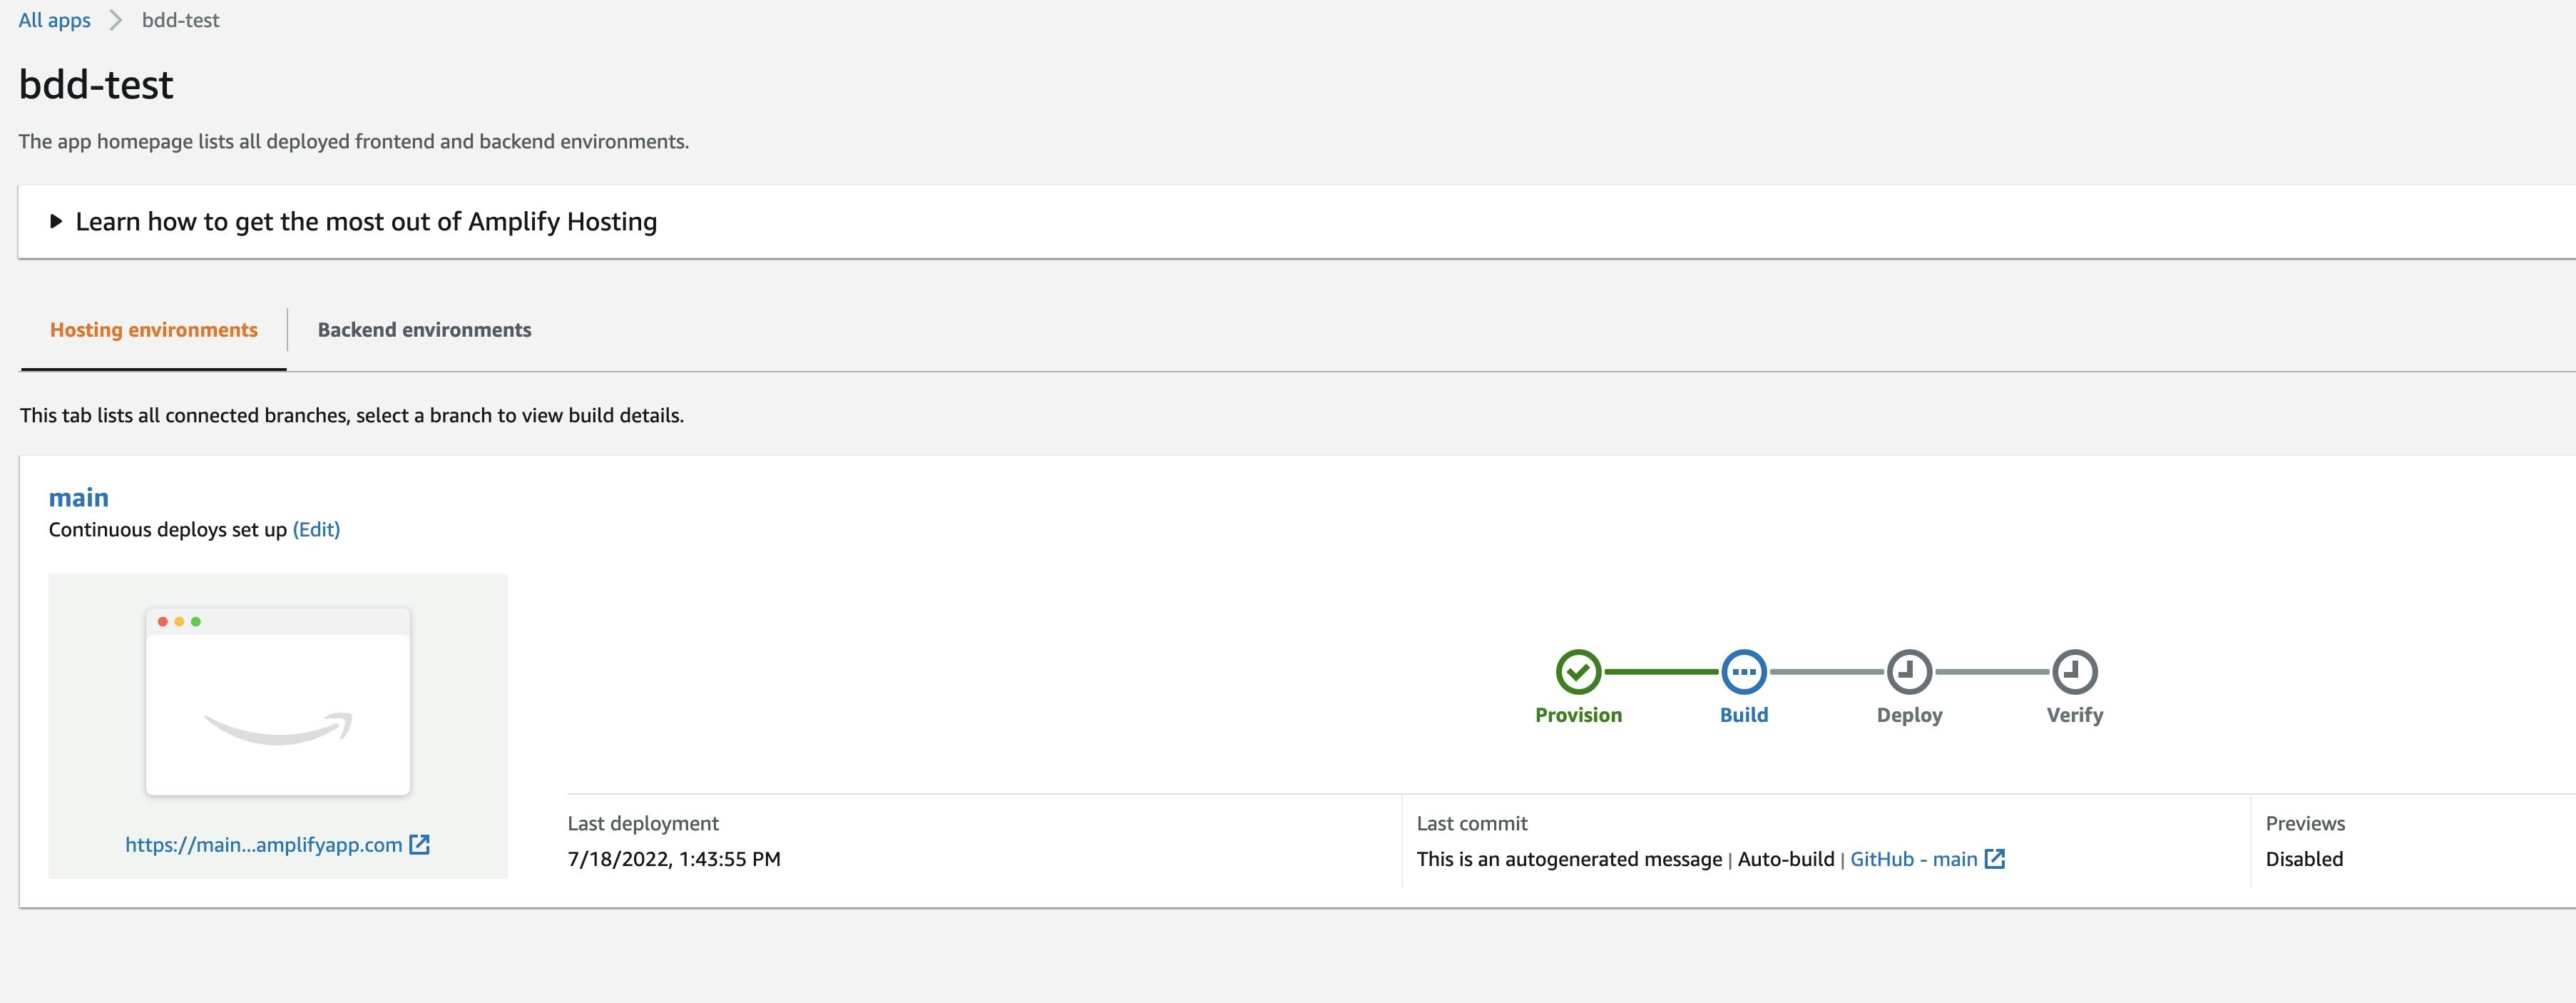
Amplify will process for awhile building your hosting environment. You can follow the progress on the status screen. You're hoping to eventually see four green check circles. The first time you run this is can take awhile for all of the resources to be build. Once all the circles are green, your application is hosted!
Now you have created your Nextjs application and hosted it on AWS Amplify. In my next post we will cover creating your backend, connecting it to your frontend and adding some data. See you there!
Resources
- Newer Posts
- Page 9 of 9
- Older Posts